The Library of Spanking Fiction: Wellred Weekly
|
||||||
|
Articles
Items of interest regarding all things spanking
|
||||||
|
|
Spanking Artist: Overbarrel (cont.) 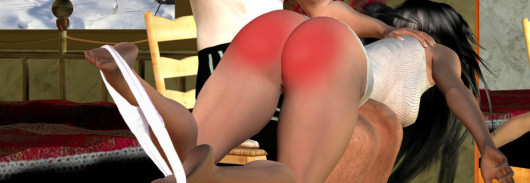 Once all this is done I am ready to start posing the scene. It's all more complicated than you might imagine as each body part needs to be posed separately. Head, neck, chest, abdomen, collars, shoulders, forearms, hands, all 3 parts of each finger, hip, buttocks, thighs, shins, feet and toes. Also, Poser people are really created for more "normal" poses and the rather extreme positions of a spanking scene sometimes cause problems with both the people and the clothing. I think the most common mistake I have seen Poser spanking artists make is not using the controls for moving the people. I see spankers sitting straight up with their arm in the air which usually looks like mannequins rather than people. During a spanking both the spanker and spankee are bending, twisting and moving from side to side. The Poser people have controls for all these things for each body part and while it may be time consuming, using these controls can really help get the spanking couple into much more realistic positions. The good thing about all this is that once I get the poses the way I want them, I can save them to be used again later in other toons and with other people. The next part is to get their expressions to match the emotions I am trying to convey with the pic. A good expression can almost tell the whole story all by itself and if it matches the body positions of the spanker and spankee that's even truer. Again, the Poser people have all the controls you need to make any expression or convey any emotion. You just have to take the time to use them. After I get all the posing done then I need to consider the lighting. There are many really great Poser artists out there doing some really nice pics by using various kinds of lighting and shadows. I rarely do that though. I have a scene with a lot of detail that I want viewers to see so my main concern is usually that everything is well lit. Normally I will create an extra spotlight to point at her bottom and another for her face since these are the parts I usually want folks to see well. 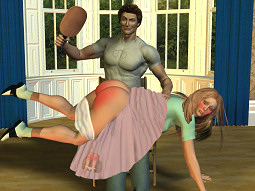 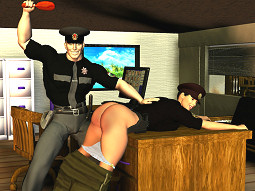 Both the lighting and the camera angle will affect the way the scene looks. For example, I can use an expression which looks just perfect to me with one set of lighting conditions and with one camera angle. Then I save that expression and use it again in another toon. That same expression may not look the same at all with different lighting or a different camera angle plus different faces may not look exactly the same with the same expression. The expressions and poses that I save often don't look the same under different conditions and have to be modified to accurately convey the physical or emotional aspects I want. Still, they are a good starting point and can really speed up the process once I have built up a number of different saved poses or expressions. There are also some standard poses that come with Poser and some free poses and expressions available at some of the shops that sell props for Poser. Many of these are also good starting points and can be modified to get to the pose I am after in a particular situation. These can speed things up too. Basically, I pose the people, get their expressions set and then adjust the camera angle. Then I might have to go back and do more adjustments to make things look right from the angle I have chosen. Unfortunately, there are things that I can't tell about or that don't show up until I render the scene so I render the scene, look at the render and then make more adjustments to correct anything I see and then render again. With a little luck I can get the pic the way I want it in just a few renders but there are times when I will do one after another, sometimes for hours at a time trying to get just the effect I want. Also, I usually have to have more than one render to take to Photoshop. This is because there are some things that Poser just will not do or does not do well. For example, the clothing for my Poser people is meant to be worn and usually has no provision for things like pants or panties pulled down or dresses raised so I use Photoshop to make it look as if they are. Some of the clothing comes with lots of morphs which is a help. I actually have one dress that I can manipulate enough to make it look pulled up but even at that it doesn't look quite right. It is a good starting point however. When I say one dress, I mean one dress that can be many. This is an item I purchased and it came with quite a few different textures. It can be a spring dress or a skirt and top or a night gown or even a short skirt with a halter top. So, like the people, I can make it seem like different dresses just by applying different textures. What I most often do once I get a good render is to make certain parts of the people or clothing invisible and then do another render before shutting Poser down and going to Photoshop. 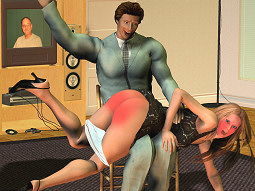  I guess I should explain that each body part of a person, prop or article of clothing can be made invisible or adjusted so it does not cast a shadow all of which is a lot handier than you might think. As I said, Poser is a 3D program and I can take a camera and go completely around the couple to look at it from any angle I like to make sure that things look right. Even at that, sometimes when I render the scene, things don't look right and I might have to go back and make adjustments to get it to look right in the final render. One of the main examples of this might be the spanker's hand on the spankee's back. Even though it may look right before rendering, in the render it might look as if his hand is above her back rather than on it. Usually in a case like this I would have to adjust the hand or fingers to make it look right in the final render. Getting the spanker's hand to look as if it is holding something, a paddle, hairbrush or her arm, is a difficult task. It might look right from one angle but not from another. It usually takes me quite some time to get it just right. Fortunately, once I get the hand posed properly, I can save the pose to use with another scene. Also, most of the paddles or hairbrushes are props which I can save as a "smart prop". That means that when I load it to the scene it will go to the proper position in the spanker's hand. As you can see, there is a lot to learn and a lot to be considered. Once I get the renders done, it's time to go to Photoshop to do the post work and finish the pic. I usually start by opening the render and re-saving it as a PDF. Then I open the render with parts invisible and place the PDF on top of it. That way I can erase portions of the original render. For example, if I have made the bottom of her dress invisible in the pic I started with and then placed the full render on top of it, I can erase part of the dress to uncover her bottom while leaving the portion that is hanging down from the front of her thighs. Then I can copy portions of the erased part and paste it back, manipulating it with Photoshop, so that it looks as if the dress is pulled up on her back. 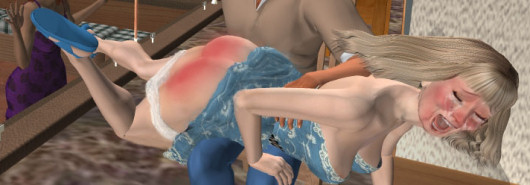 Panties have been so much of a problem for me that I don't even render them in Poser unless the girl is still wearing them. If they are supposed to be pulled down, I just render the scene with no panties. Then I go to a folder I have with photographs of girls with panties pulled down and copy and paste the panties into my pic. Of course, it's not quite as easy as that since the camera angle or size of the photograph might be different. Often I will have to do more than one paste, use Photoshop to manipulate them and perhaps the cloning tool to stitch them together so that it looks like one pair of panties pulled down. That's one reason I usually always use white panties since it would probably be impossible to match the pattern of the panties she's seen wearing with the ones I have photos of. The other reason is that I just like white panties. Because the positions of the spanker and spankee are often more extreme than normal poses, it will sometimes appear that the clothing is torn in places. I can use the same technique to fix these tears or I sometimes just use the cloning tool for smaller places. Also, the Poser people, especially the joints, will sometimes look wrong in these extreme poses too... almost as if they are torn or have a deep line. I usually use the cloning tool in Photoshop to fix those so they look right. Once the clothing and small fixes are done, I usually do the coloring next. In any proper spanking scene, the girl should have all cheeks blushing. For her bottom cheeks I will use 2-3 layers for each cheek. Using one layer for the whole cheek, I color it way too red and then turn the color down to get it where I want it. Then I start a new layer for the sit spot and repeat the process. Then I adjust the color for the sit spot to get the color right for the situation and also so it blends with the rest of the cheek. I always use a brush that has a soft line rather than a hard line. That way there is more color in the center and less as you go farther from the center. That way it appears that the color gradually fades as you go away from the sit spots. Of course, Photoshop has a bunch of different modes for their brushes but the normal mode with the fading brush seems to work the best for me. At the start of the spanking I will probably use only these 2 layers. After the spanking has gone on a while and her bottom is getting really red I will probably add a third layer to add a little shine to her bottom cheek. It always seemed to me that a girl who is getting a good, punishment spanking will invariably develop a case of "shiny hiney" before it's all over. This process has to be repeated for the other cheek and the process for doing the blush on her upper cheeks is similar. continued... |
|||||
| Pages: 1 2 3 4 5 6 7 8 9 10 11 12 13 14 15 16 17 | ||||||


